• We are The Low Energy Efficient Custom Home Builder in Central Ohio

    Posted March 13, 2017 By in Blog, Green Construction With | No Comments

    “We are what we repeatedly do. Excellence, then, is not an act but a habit” -Aristotle

    Capaldo Builders is honored to announce that we were awarded the lowest rated HERS Index Score for Central Ohio in 2016

    coming in at 37 for our “Grandview Heights Green Re-build” Project.

    Ratings provide a relative energy use index called the HERS Index to indicate how well the home preforms energy-wise – a HERS Index of 100 represents the energy use of the “American Standard Building” and an Index of 0 (zero) indicates that the building uses no net purchased energy. The lower the value, the better.

    Follow these links to learn more about our project, environmental solutions, green technologies and view photographs of the green construction process

    https://www.facebook.com/capaldoconstruction/posts/10153750514434379

    https://www.facebook.com/pg/capaldoconstruction/photos/?tab=album&album_id=10153383167704379

    Follow this link to learn how the HERS Index Score is calculated

    http://www.hersindex.com/how-is-the-hers-index-score-calculated

    Contact Rob Capaldo at 614-554-3998 for more information on how we can build you a Low Net Energy Efficient Home!

    FullSizeRender (2) FullSizeRender (3) FullSizeRender (6) FullSizeRender (5) FullSizeRender (4)

  • PARADE OF HOPES

    Posted September 15, 2016 By in Blog With | No Comments

    I was recently given the Columbus Dispatch’s “Special Advertising Section” – Titled “BIA PARADE OF HOMES: BE INSPIRED TOUR 16 SPECTACULAR NEW HOMES”. As a Custom Home Builder, I look at not only the completed homes but also the advertising, the building process, and the price tags and I say to you “Be Scared”.

    1. UNAFFORDABLE HOUSING = SOCIAL INEQUALITY. With 16 homes ranging from $869k to 1.3m the Building Industry Association has opted to blatantly promote a key component of social inequality concerning housing policies that simply create islands of poor and low-income families who, for all intents and purposes, have been ignored and cut off from mainstream society.
    2. SHODDY WORK. Time frames for building a Parade Home are rushed. Builder’s negotiate a “No change order policy” for a Parade Home because homeowner upgrades and change orders delay the building process and the Parade of Homes date has been set in stone – the house must be completed on that date. Not so much of a “Custom Home” process. If getting the house done on a specific date is important for homebuyers, this will push builders to purchase products and services based on installation time, not quality.
    3. PROMOTIONS – The bonus for Builder’s in the Parade of Homes, is that most sub-contractors are willing to take a pay cut. Sometimes, they might even do the job for free, and materials are donated by companies for exposure. Builder’s then promise homeowners some substantial “discounts” for their participation…maybe they get it, maybe they don’t – sad thing is that homeowners never know the difference because they have no way of knowing how much everything would cost otherwise.
    4. THE EXHIBITION HOME – Without a doubt that brand new carpet is going to have to be replaced having two thousand plus people walk on it during the Parade. Then the Security, do not plan on buying a Parade Home without a real serious hardwired system with surveillance.

    In the end, no parade for us.

  • Polar Vortex Resistant Hose Bib

    Posted November 13, 2014 By in Blog With | No Comments


    hose bib

    Winter comes along and apparently tries to destroy our water lines every year. The best way to minimize the damage from cold weather on household plumbing is to do a little preventive winterizing. A good starting point is to winterize your hose bib. These few steps will take a small amount of time but they could save you a lot of money and inconvenience.


    Disconnect – First things first, no matter what kind of hose bibs you have, freeze proof or not, it is very important to remove hoses, splitters or connections from the spigot during the winter. Not removing hoses or any other connections from the hose bib can trap water and can therefore surely cause the fixture to freeze.

    Inspect – The next step to winterize your hose bib is leak detection and repair. Check all hose bibs for leaks and drips. If you do find any leaks or drips repair or replace the fixture before the temperature drops to freezing. Water dripping, no matter how slowly, can block up and freeze in the pipe or fixture.

    Drain – Getting as much water out of the pipes is essential for your hose bib. The best way to do this is to shut off that line if possible and drain it down. If you cannot isolate the water supply to hose bib to shut it off be sure to use extra insulation in the next step.

    Protect – The last step to winterize outdoor faucets is to protect them with insulation. An easy way to do this is to install a hose bib cover on each outdoor fixture including frost free hose bibs. Hose bib covers are square or dome shaped to fit right over outdoor faucets. They are made of thick foam so they are quite effective at keeping most of the cold away from the valve.

  • Tile Installation : Don’t get screwed by just sticking and screwing.

    Posted January 21, 2014 By in Blog With | No Comments

    The days of grabbing a three dollar bag of “thinset” and sticking floor tile right to the plywood are long gone (for professionals, anyway). For proper tile installation you need a proper substrate. One of the most readily available are cement backerboards, including the product wonderboard that we used in this home.  

    When properly installed on your floor it is an ideal tile substrate for a quality and lasting installation. Notice I said typed “properly installed”? Laying them down on the floor and shooting drywall screws through them does not constitute proper installation.

    The joints in backerboards should be staggered, that just means that none of the seams should line up across the room and no four corners should be placed together. By staggering the seams you add strength to the installation simply by not having a significant weak point in the substrate.

    You also want to leave 1/16 to 1/8 inch gap between each sheet – do not butt them together, and around the perimeter. If you butt them together you leave no room for expansion. The backerboards will not expand, but your walls will. If everything is butted tight and your wall expands into the room it will cause your floor to pop loose and possibly ‘tent’ or peak at the seams.

    Beneath the backerboards you NEED thinset. Just about any thinset will work but you need to have it there. Skipping this step virtually eliminates the purpose of preparing your substrate for tile – you may as well go grab that three dollar bag and start setting tile now. You need it – really.

    Installing thinset beneath backerboards

    You need to trowel thinset onto your floor. This step is imperative for a proper tile installation. The thinset is not meant to ‘stick down’, adhere, or otherwise attach your backerboards to your subfloor. It is simply put in place to eliminate voids beneath your backerboards. Once laid into the thinset bed the floor becomes a solid, fully supported substrate for your tile – that’s what you want.

    If you have an air pocket or some certain spot in your floor that is not level or flat with the surrounding area and you simply screw your backerboards onto it this will create a weak spot in your floor. Constantly stepping on that spot will, over time, loosen the screw and your floor will move.

    When your floor moves your grout cracks. When your grout cracks your tile may become loose. When your tile becomes loose your tile may crack.  Put thinset beneath your backerboards.

    Once you have the area fully covered with thinset you can lay your backerboards into the bed of thinset and screw it down. There are screws made specifically for cement backerboards. You should be able to find them at any hardware or big box store. They have grooves on the underside of the head which will dig into the backerboard and create its own ‘hole’ in which to countersink the head as it is screwed in. How cool is that? They are more expensive than drywall screws – just so you know. But you need to use them.

    Each manufacturer has their own specific spacing instructions for screwing down the backerboards – follow them – really. Some say every 12″ and some want every 6 – 8 inches. The board you use will determine the spacing.

    Start your screws in the center of the board and work out. This eliminates undue stresses on the boards. If you screw all the way around the outside and it is not perfectly flat you are going to have to release that pressure somewhere and it won’t happen until you have all that pretty tile on top of it. Working from the center out eliminates that.

    Your floor is probably too thick (should be) for the backer screw to actually penetrate into the floor joist. If not, or just to be safe, do not place screws into the area above the floor joists. The plywood or chipboard which makes up your floor will expand and contract at a different rate and, more than likely, in different directions than your joists. If you screw your backer into the ply and into the joist six inches over it will cause inconsistent movement – no good. Do not screw your backerboard into your joists.

    The last thing you need to do is tape your seams. Get an ‘alkali resistant’ mesh tape – similar to drywall tape – and place it over all your seams in your floor. Then mix up some thinset and trowel it over the tape with the flat side of your trowel. Just like taping and mudding drywall. This will make your floor one large monolithic structure and lock it all together. You want alkali resistant tape so it will not break down due to chemicals present in most thinsets.

    That’s it! Congratulations, you now have a perfect floor for your perfect tile installation. When installing floor tile – or any tile for that matter – the most important aspect of the installation is always the preparation. Everything beneath your tile is important, if any one aspect is done incorrectly it may compromise the integrity of your installation. Take your time and do it correctly, you will be much happier for it.

  • “Simply Skilled Scott”

    Posted November 14, 2012 By in Blog With | No Comments

    A good finish carpenter is more than a carpenter. They are highly skilled in various types of detailed wood finish projects; such as built-ins, custom closet design, staircase and balcony railing, installing doors, custom cabinetry, a fireplace surround, or any type of carpentry and joinery project requiring precision and attention to detail.

    Our trim carpenter, Scott Johnson, is the one-man show of his company Simply Wood LLC and is an expert at installing interior trim. He possesses a high degree of the visual skill required to complete quality finish work that looks square and level over framing.


    If you step into any of our custom built homes, you are likely to see exceptional custom cabinetry, built in cabinetry, crown molding, baseboard trim, door casing, and window trim. Scott is an expert at fabricating and installing elaborate cornices or crown molding at the top corners of the walls, large multi-pieced baseboards, wainscoting (wood paneling on walls), and chair rail (molding along the middle of the wall that showcase the craftsmanship of the structure.


    Capaldo Construction ensures that the quality of work performed by our sub-contractors is the best in the industry.

  • Safe Escapes

    Posted October 17, 2012 By in Renovations With | No Comments

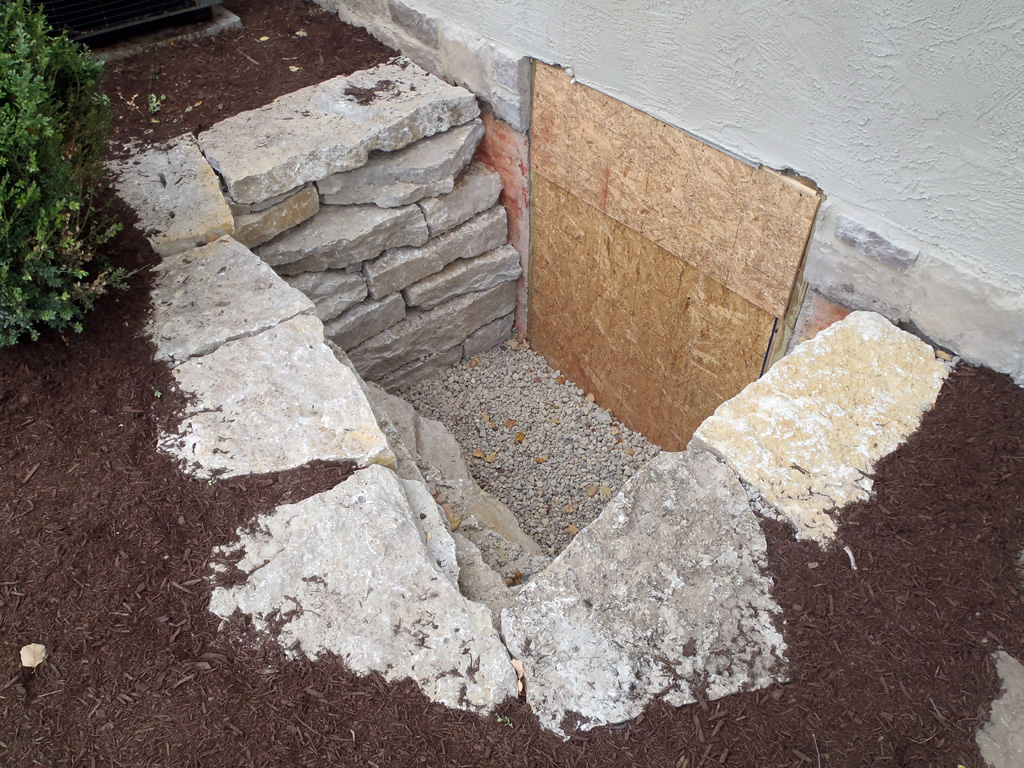
    An egress window is a window that is required in specific locations in a dwelling and is intended to provide an emergency means of exiting a dwelling.  Windows must meet specific size and requirements to qualify as an egress window.

    Egress windows are required in every room used for sleeping purposes (bedrooms) on any floor and in basements with habitable space. If you are constructing a new home, the code requires that you put an egress window in each bedroom. It also requires an egress window in the basement if habitable rooms will be finished in the basement. If you install a basement bedroom or bedrooms, an egress window is required in each bedroom. If you have an existing home and you add a sleeping room in an unfinished basement, the code requires that you install an egress window in the sleeping room or rooms.

  • American Builders Quarterly Publishing Sept/Oct Issue 2011

    Posted July 25, 2012 By in Blog, Publishings With | No Comments
  • Old technology Owes ecology An apology.

    Posted August 15, 2011 By in Blog, Uncategorized With | No Comments


    Your own property has the potential to be your source of heating and cooling comfort. Now you can get safe, reliable, energy efficient heating and cooling from one piece of equipment. Geothermal energy represents the leading edge of heating and cooling technology. It moves heat energy to and from the earth to heat and cool your indoor environment. And compared to ordinary systems, geothermal technology can save you up to 70%  on your monthly energy bills. Geothermal is the safest, cleanest, most reliable space conditioning system you can buy.

    Geothermal energy is an unlimited resource. The lot surrounding your property contains a vast reservoir of low temperature thermal energy, typically 10 times that required over an entire heating season. This resource is constantly resupplied by the sun, the surrounding earth, and heat rejected while cooling during the summer. You get a 30% federal government tax credit right off the top, so for example…a homeowner is spending $47,000.00 total to install a new geothermal vertical drilled heating and cooling system. Tax Credit: $47,000.00 x 30% = $15,666.65. The actual cost to the homeowner is $31,333.35. take note, if they had chose to purchase a conventional heating and cooling system, they would have to purchase two very noisy outside air conditioning units and two forced air furnaces costing a total of approximately $22,000.00. Now lets discuss their monthly energy bills respectively. Their home is 5850 square feet.  With the conventional system they pay approximately $600.00 a month in energy bills…they save 70% with their geothermal unit which is only $180.00 a month…now they saved 2,160.00 the first year, so in only about 3 years, they are ahead of the game, actually maybe even earlier, because we all now how AEP and Columbia Gas like to increase their rates often. AND, think about their re-sale value… who is going to buy their 5850 square foot home without this technology? Now, I know that is a lot of number crunching to digest so to put in perspective…geothermal homeowners are going to pay less taxes, save money, and protect our environment. This is our third geothermal savvy homeowner, it just makes sense.


  • Teak Talk

    Posted August 4, 2011 By in Blog With | No Comments
    Teak is a safe and natural alternative to ozone-depleting materials and substances. We incorporate teak into surprising and intuitive features of our custom built homes…take for instance…the shower floor.

    Not only does teak wood NOT contain any HCFCs (chemicals with ozone depletion potential), but the trees in teak wood plantations actually help to limit damage to the ozone, and they help to capture the CO2 emitted by millions of cars on a daily basis.

    Teak wood is a natural element that requires little to no processing involved in its manufacture.

    Natural or minimally processed plant based products, such as teak, can be considered eco-friendly because – in contrast to artificial materials – they require low energy use, low risk of chemical release, minimal chemical use and teak wood does not need to undergo an extensive industrial processes.

    Teak is renowned for its exceptional longevity and low maintenance.

    Teak is one of the most sought-after and durable of all woods because of if it’s impressive ability to stand up to the elements. It’s exceptional durability makes teak wood “green” because it’s maintenance has very low impact on the environment and because it also doesn’t require rapid replacement. Why is teak a great material for a shower floor? Well, there are some distinct advantages, such as these:

    It is Durable and Strong, Waterproof, Low-Maintenance and Long-Lasting.


  • The Bidding Process, Demystified

    Posted July 31, 2011 By in Blog, Home Bidding With | No Comments

    From Surveying and Staking your lot to selecting your Towel Bars and Paint Colors there are hundreds of items and thousands of hours that go into completing a transparent and quality new custom home estimate. Beware of  General Contractors who offer you a procedure for choosing your items based on their “plan A, B or C” package for any of your selections (plumbing fixtures, lighting fixtures, floor treatments, cabinet quality….etc, sometimes called “allowances”) without showing written estimates on descriptions, manufacturers and set price from sub-contractors. The more candid your builder is, whomever you choose, will ethically provide you with a complete, detailed break-down of financing issues, materials, specifications, scheduling and a pricing spreadsheet for your new custom home. Choose the builder who hands over a book-length bid…not an outline. Also…be sure to ask, does your builder offer design and decorating services to guide you through your choices, price inflation allowances due to extended building times or cost-plus pricing? Take Note…does your prospective builder return your phone calls promptly, effectively resolve all your questions and thoroughly disclose their proposal? Rob and I want you to feel the gratification of a fully endorsed estimate and quality-built home with a respect for your budget.

  • Page 1 of 212»

Copyright © Capaldo Builders- Columbus Home Builders. All Rights Reserved.